Image Proctoring and Image Analysis
Last updated: July 22, 2026
Image Proctoring and Image Analysis help you monitor candidate behavior during tests using webcam images.
Image Proctoring
Image Proctoring captures candidate images at regular intervals during a test. You can review the captured images in the candidate’s Summary Report.
Note: Image Proctoring feature is disabled by default.
Enable Image Proctoring
You can enable Image Proctoring at the Company level or the Test level.
Company level: Applies to all new tests within the company. You can override this setting for individual tests unless it is locked.
Test level: Applies only to the selected test.
Enabling Image Proctoring in Company Settings
To enable Image Proctoring in Company Settings:
Log in to your HackerRank for Work account using your credentials.
Go to Settings > Test Settings.
In the Test Integrity section, turn on Image Proctoring.
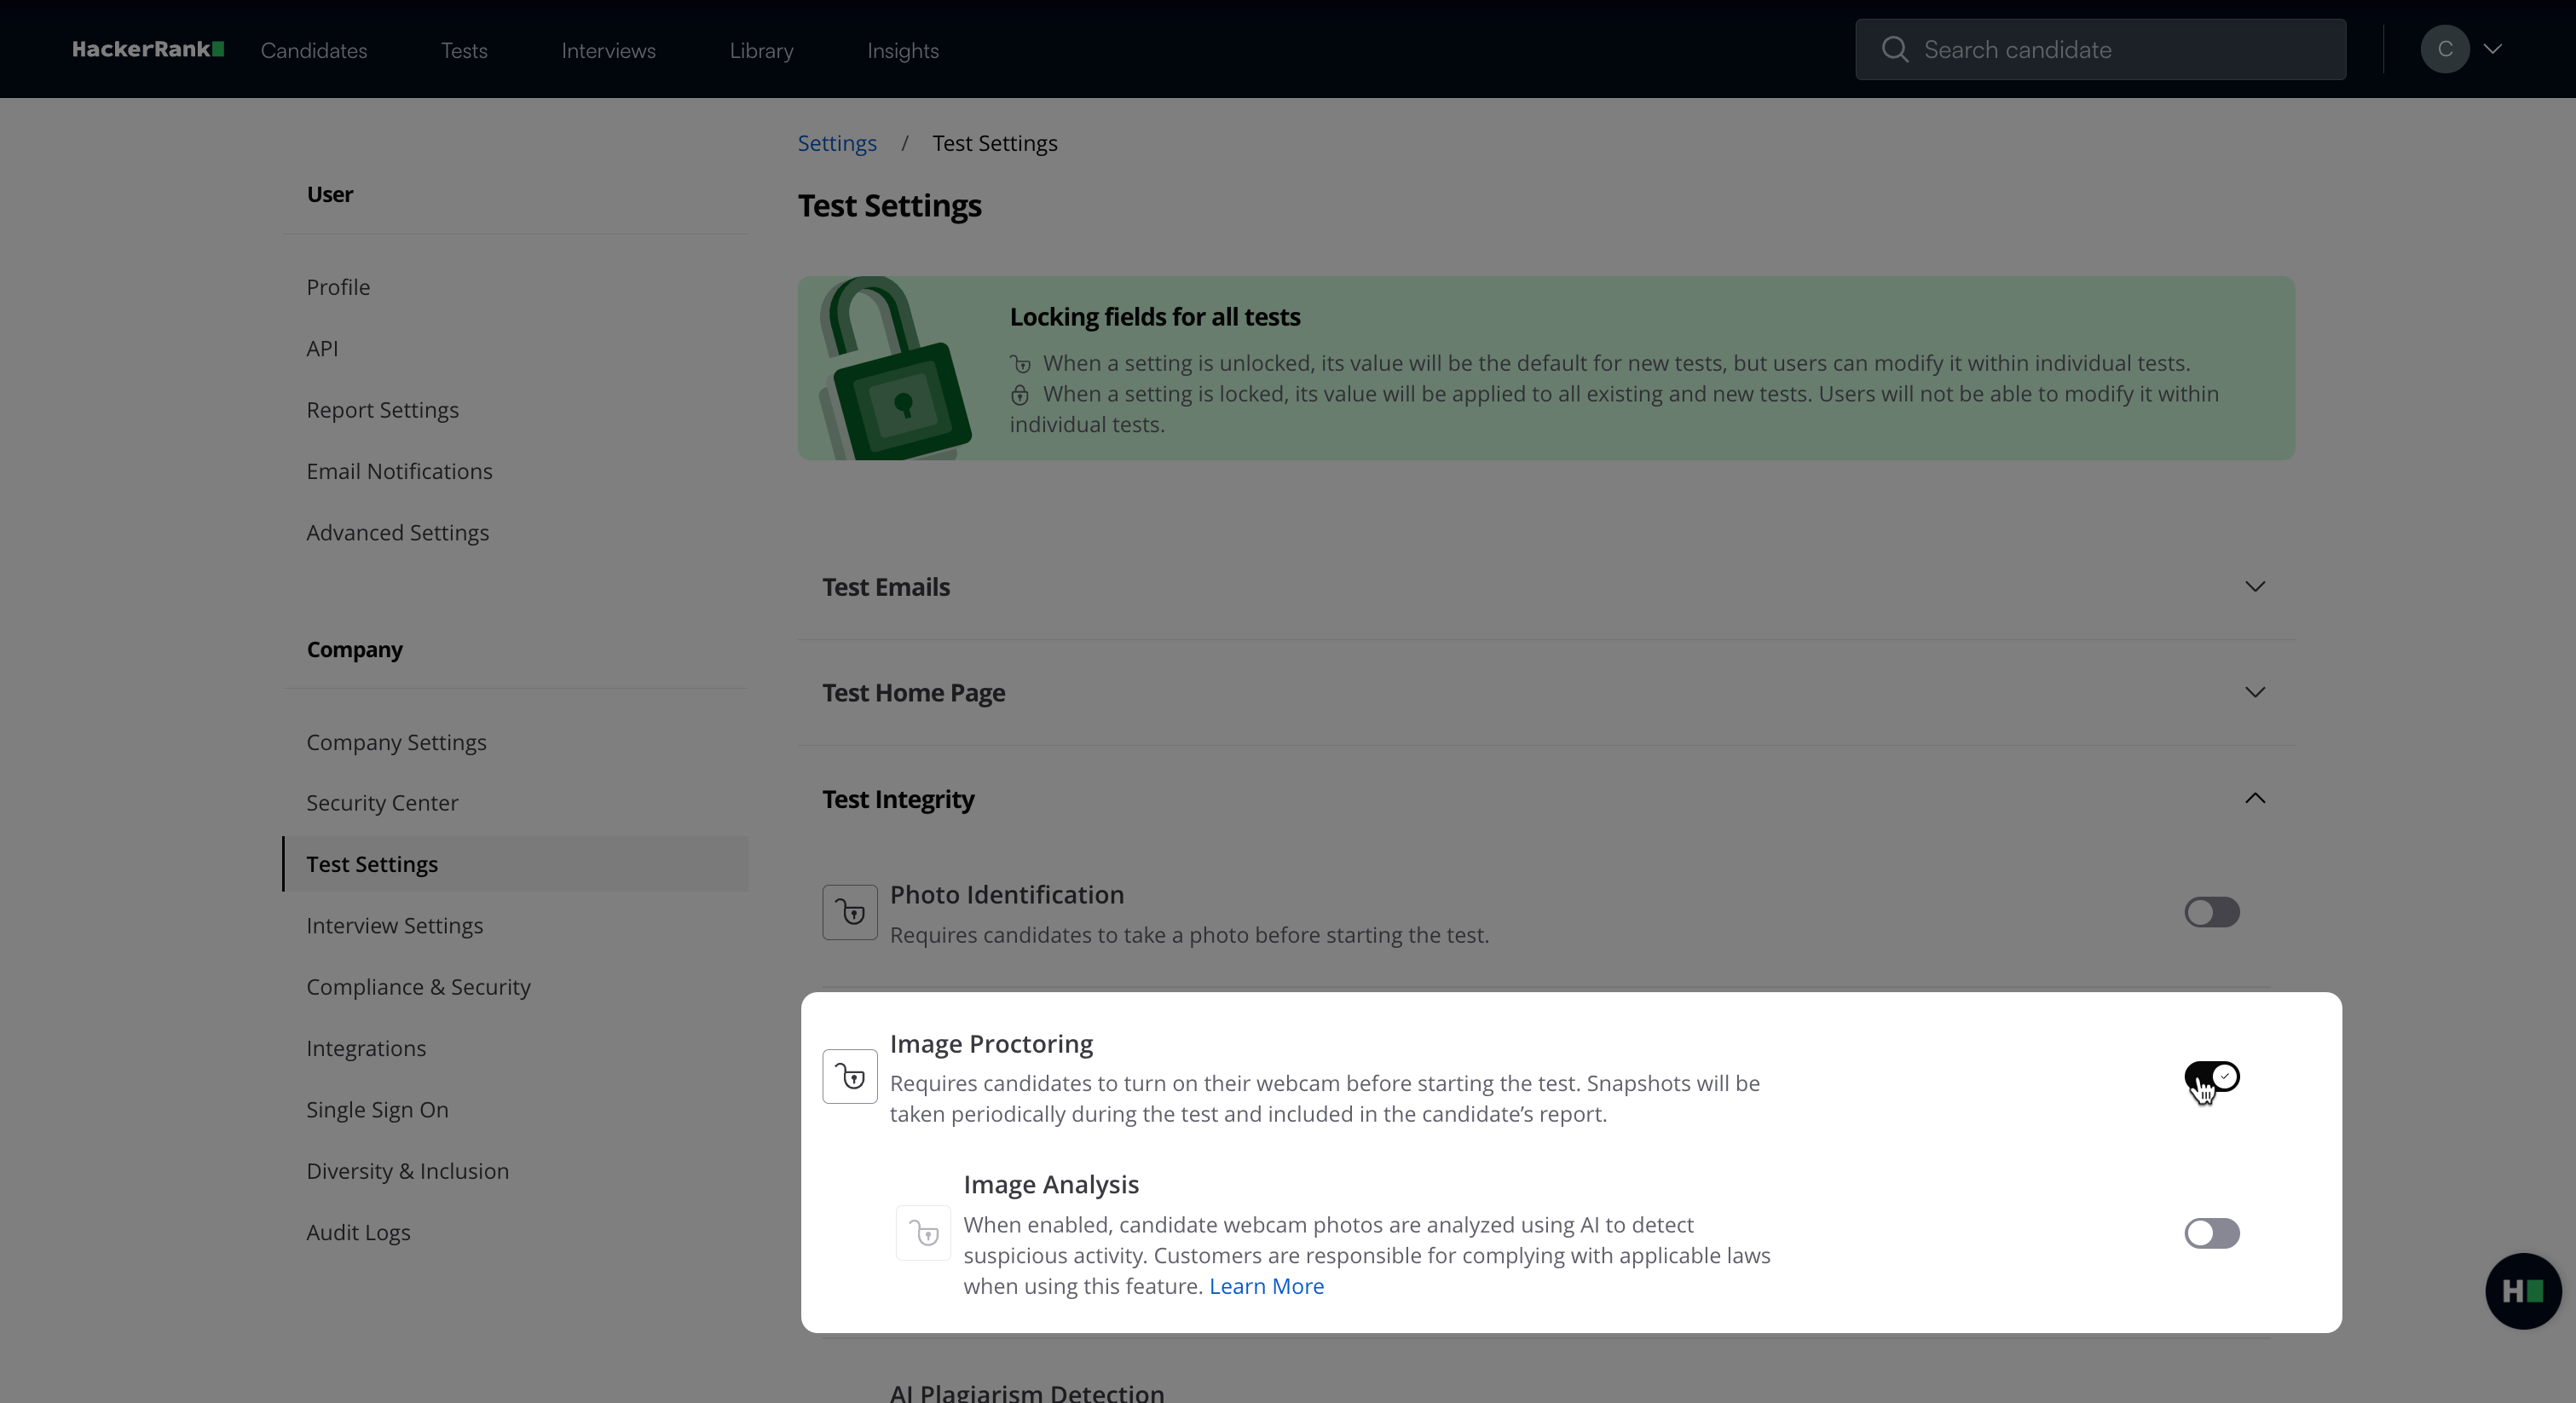
Click Save Changes.
Enabling Image Proctoring at the test level
To enable Image Procotoring at the test level:
Go to the Tests tab.
Select the test you want to configure.
Go to Settings > Test Integrity.
Turn on Image Proctoring.
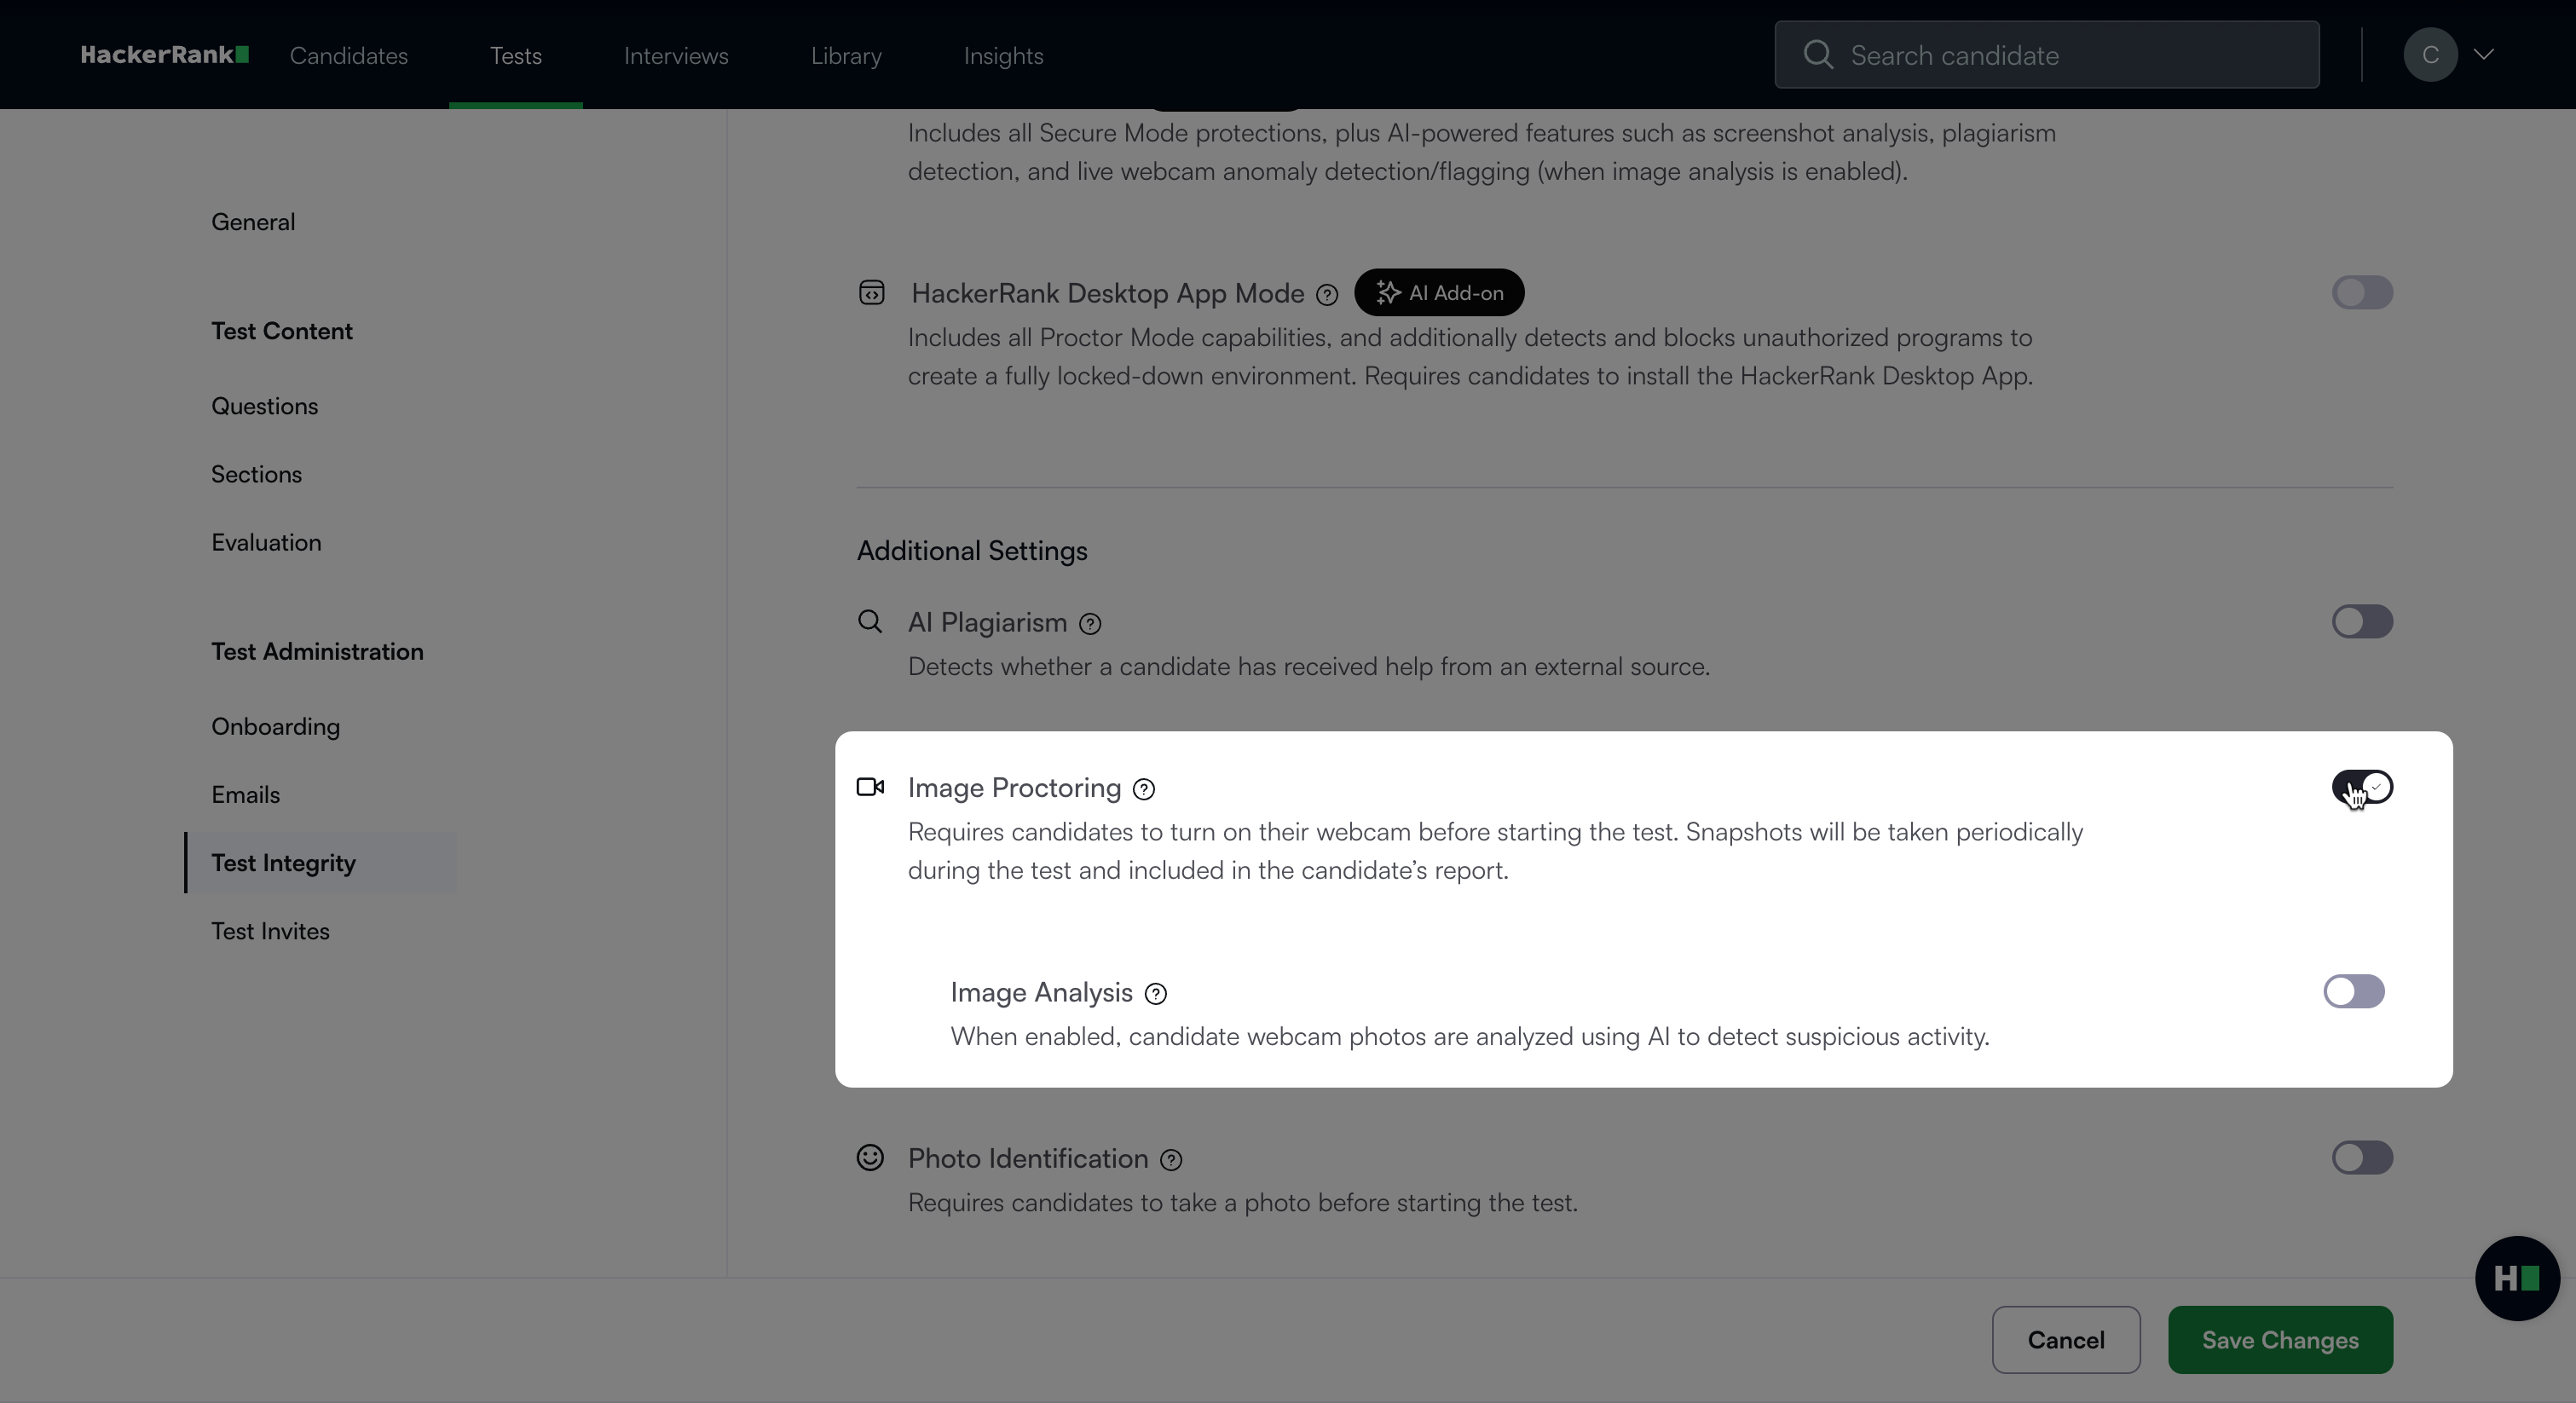
Click Save Changes.
How Image Proctoring works
Before the test
The system prompts candidates to allow webcam access. Candidates must select Grant Access under Allow Webcam Access to proceed.
The system displays webcam setup guidelines, and candidates can select Continue.
The system captures an initial image to verify visibility. The candidate must ensure their face is clearly visible.The test starts only if the candidate’s face is clearly visible.
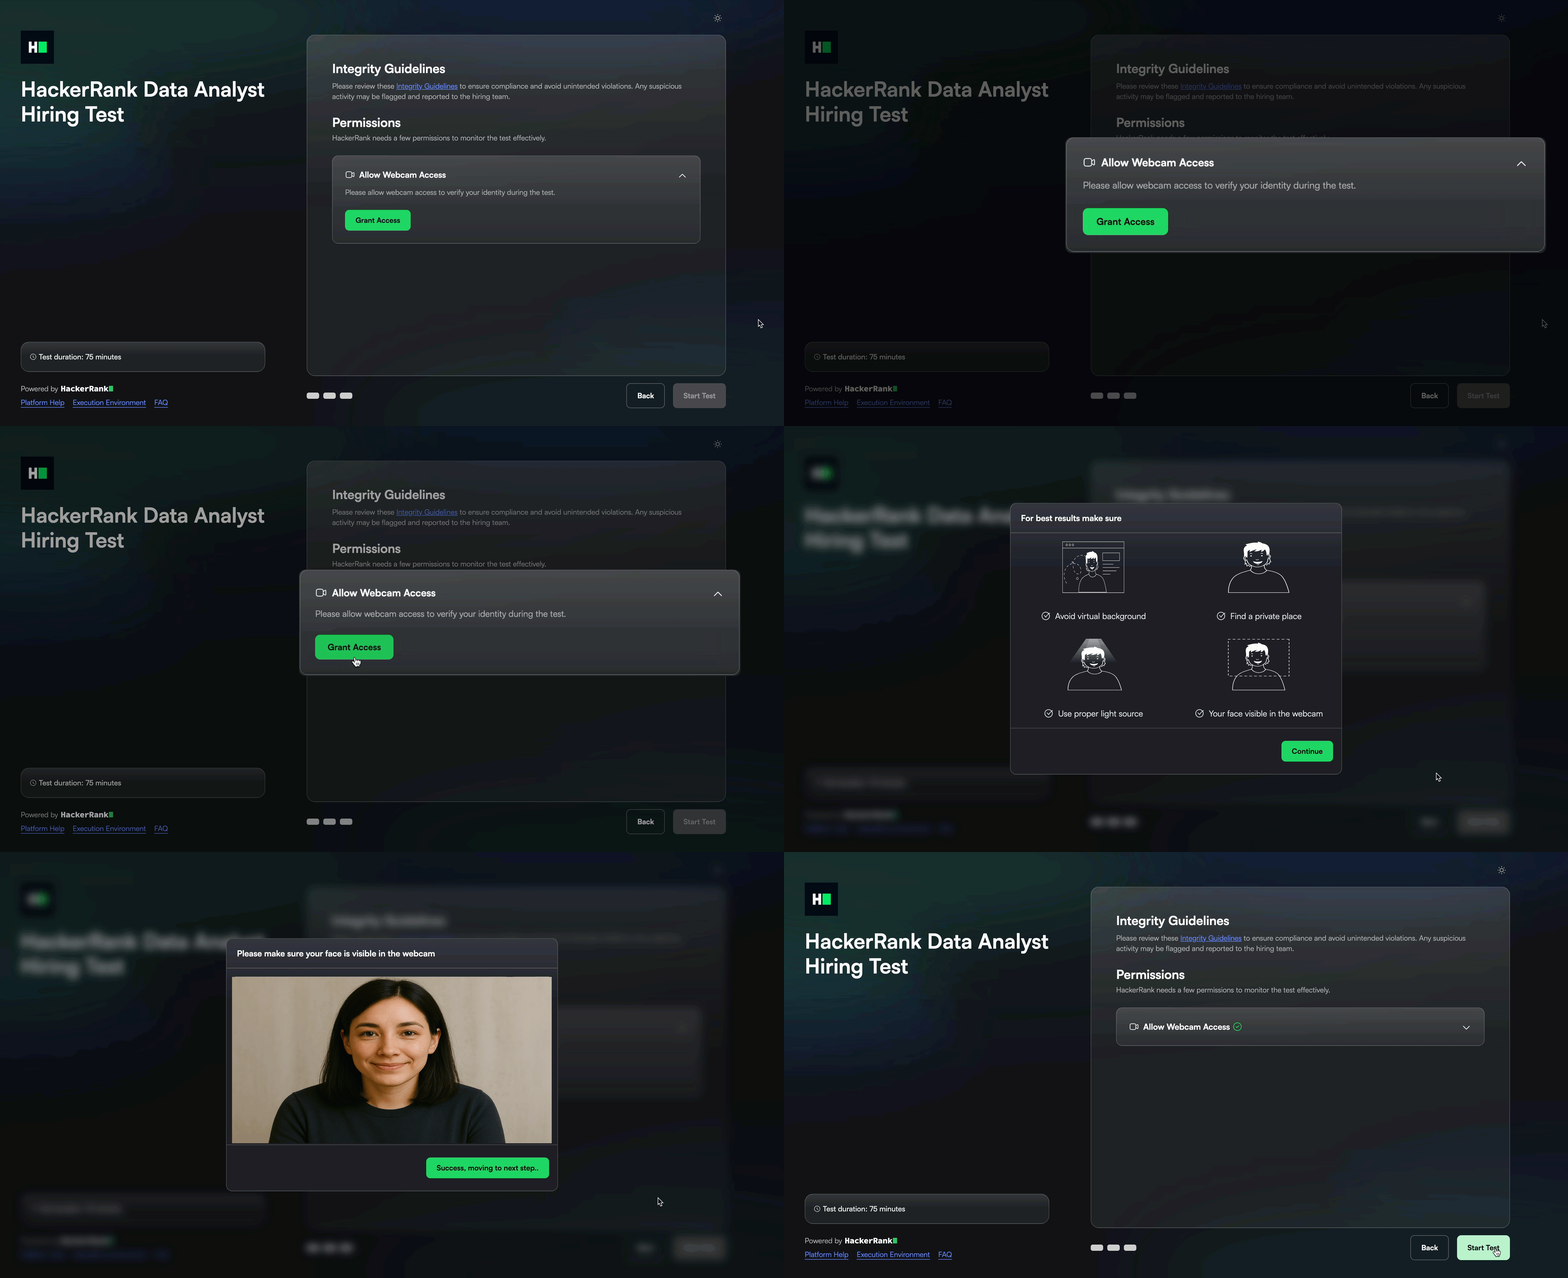
During the test
The system captures images at regular intervals until the candidate submits the test.
After the test
The captured images appear in the candidate’s Summary Report for manual verification.
To view the images in the Summary Report:
Open the candidate’s Summary Report. For detailed steps to access the Summary Report, see Accessing the Summary Report.
Go to the Attempt Activity tab.
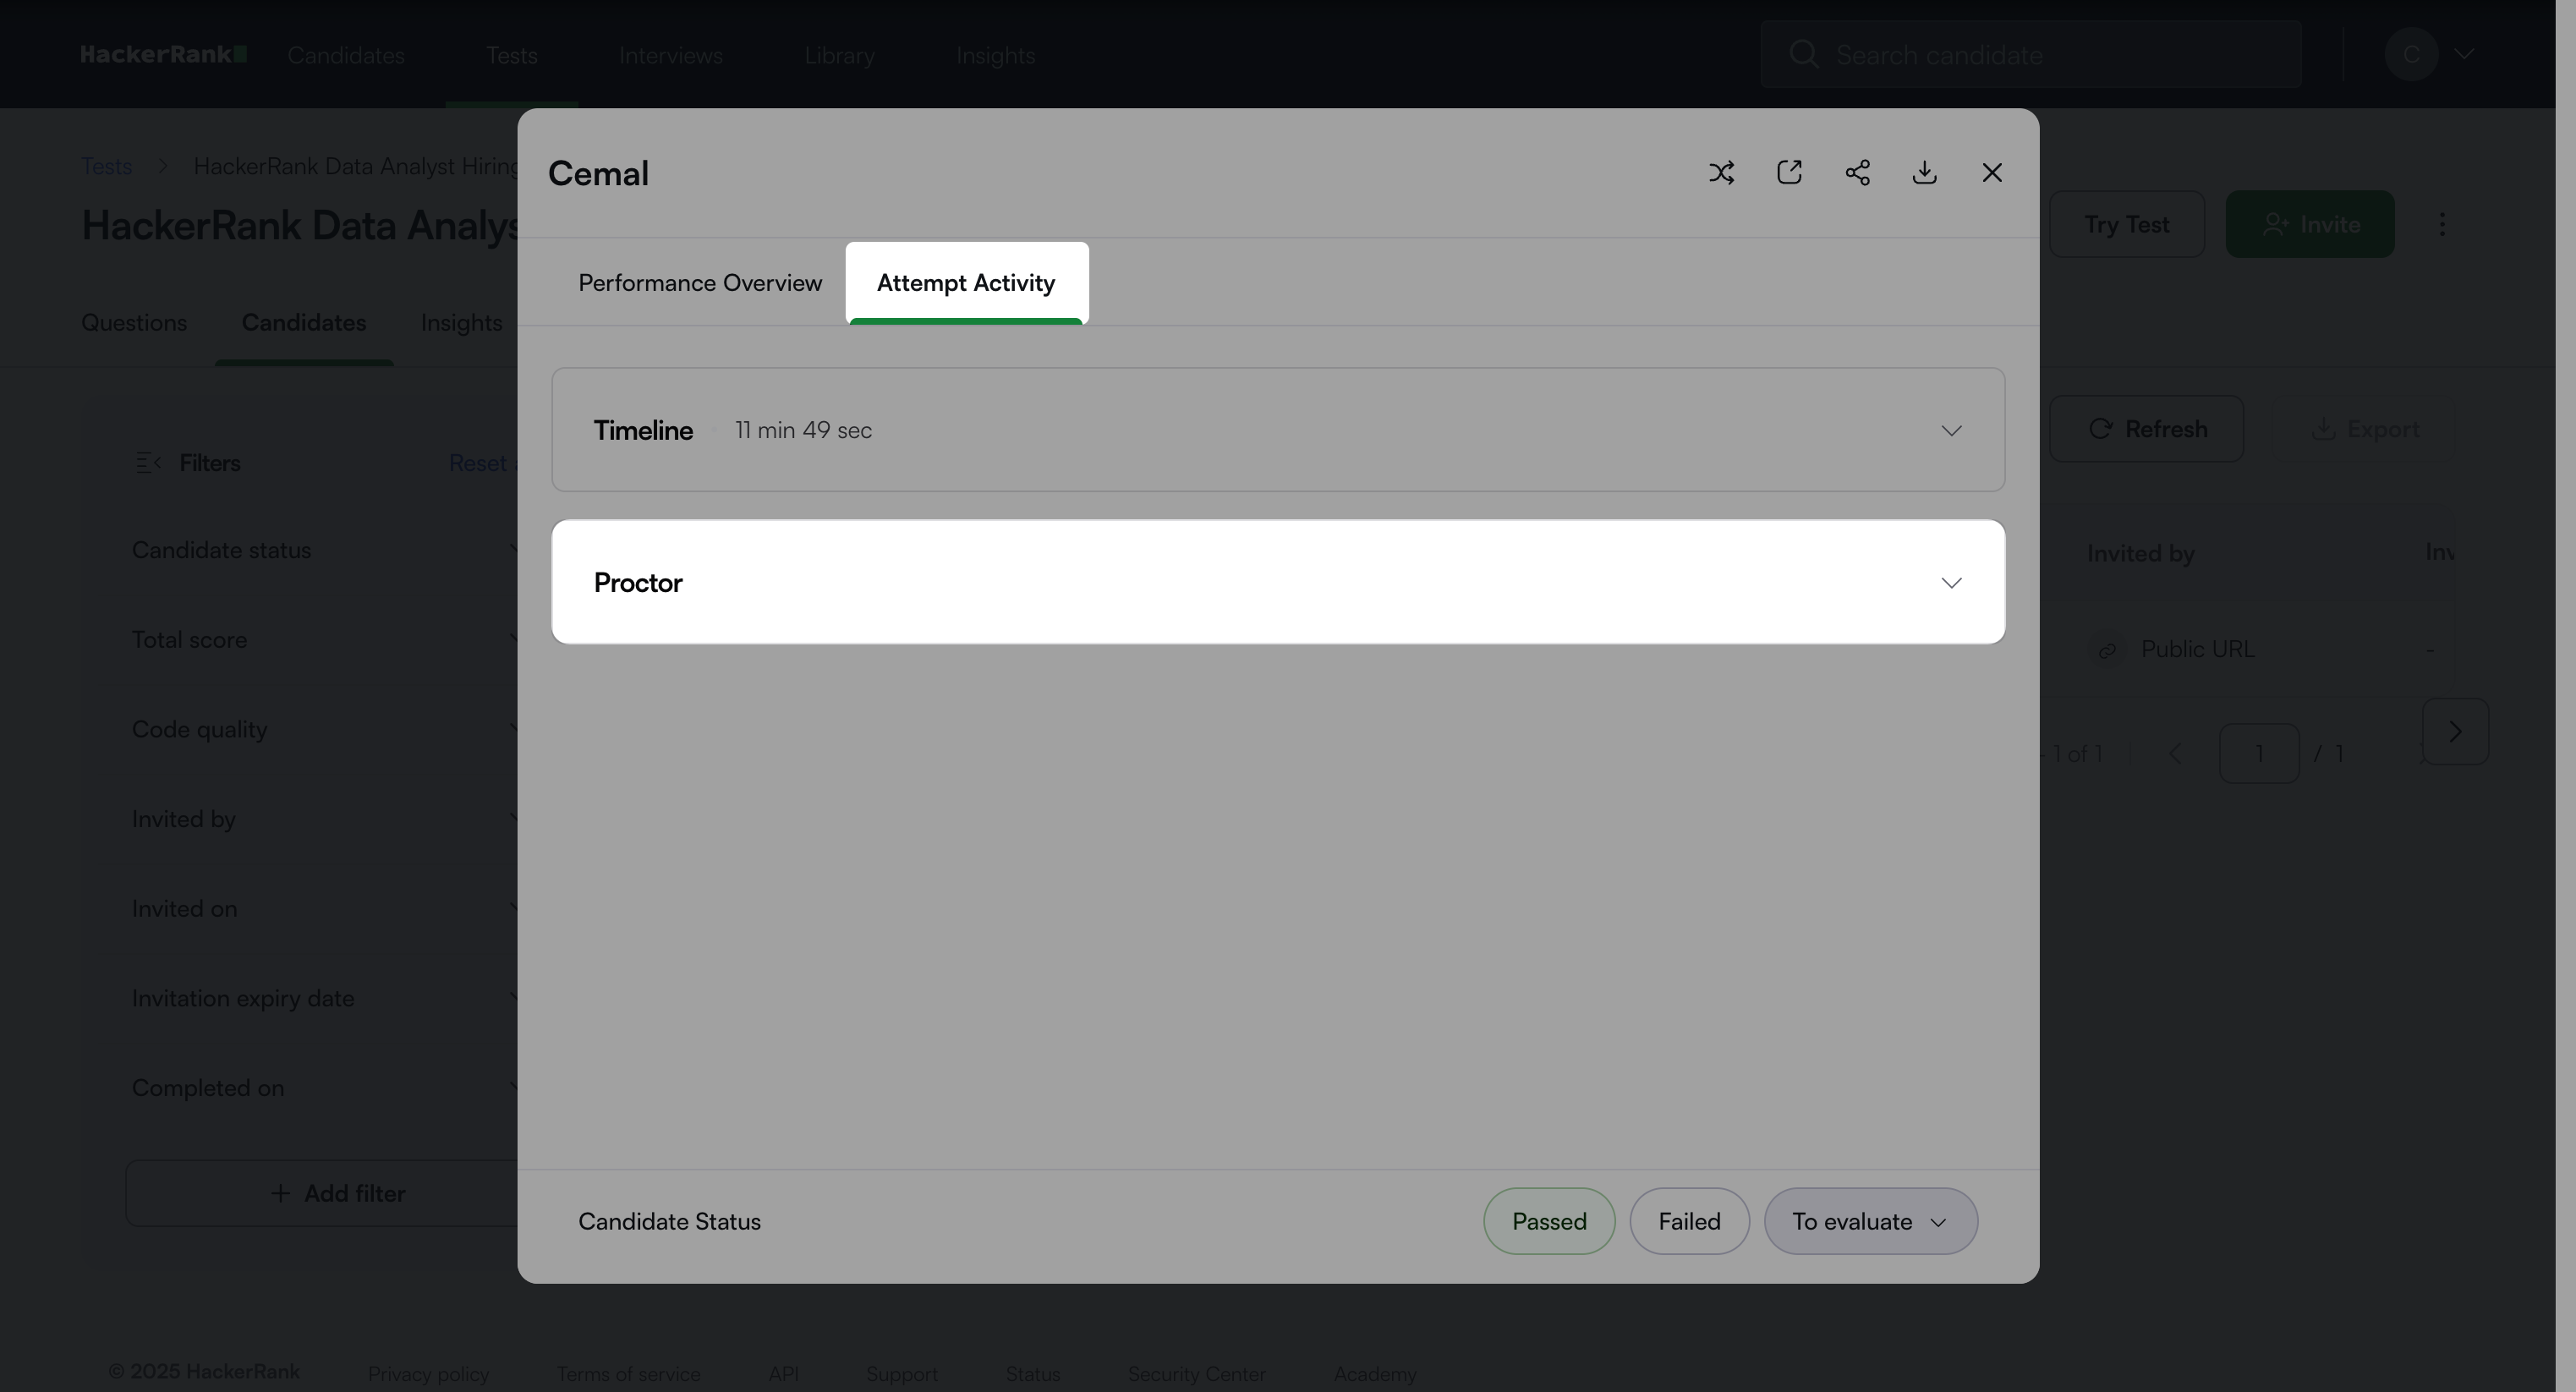
Expand the Proctor section to view captured images.
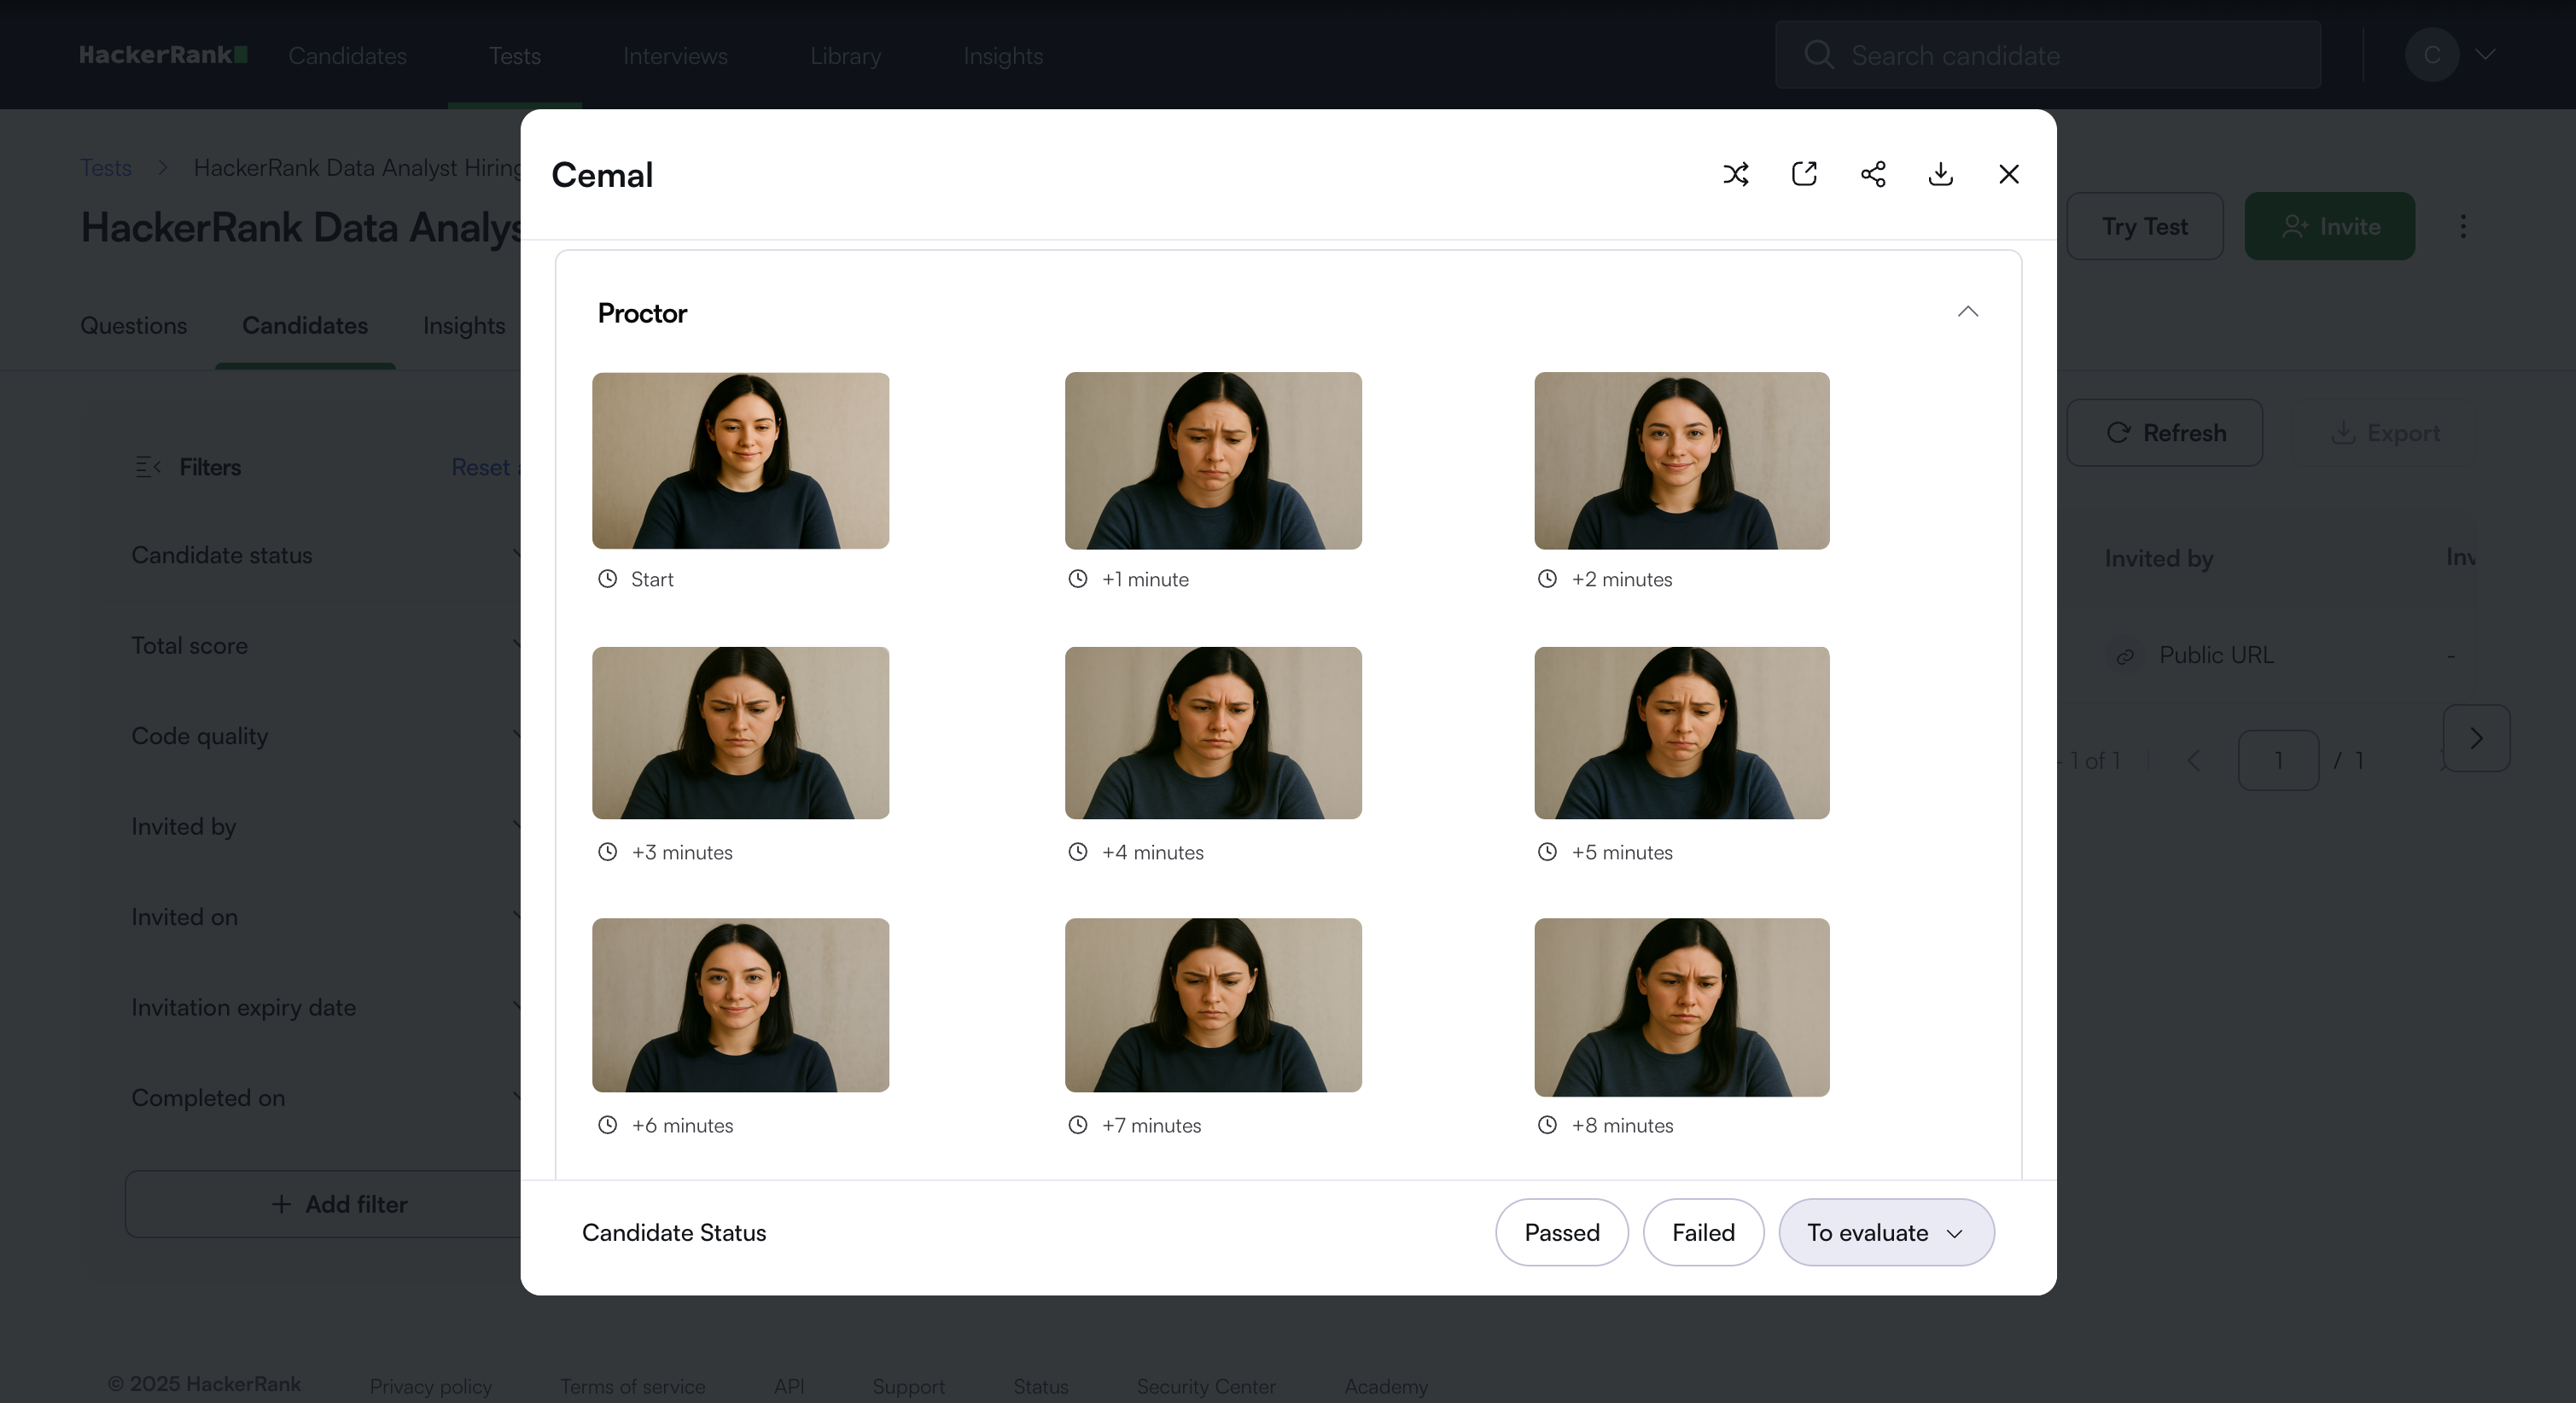
You can review these images to verify candidate activity during the test.
Image Analysis
Image analysis uses AI to analyze candidate images and detect signs of suspicious activity during image proctoring across different testing environments and lighting conditions, including home setups, campus labs, and low-light conditions.
Note: Image Analysis feature is disabled by default.
Enable Image Analysis
You can enable Image Analysis at the Company level or the Test level.
Company level: Applies to all new tests within the company. You can override this setting for individual tests unless it is locked.
Test level: Applies only to the selected test.
Enabling Image Analysis in Company Settings
To enable Image Analysis in Company Settings:
Go to Settings > Test Settings.
In the Test Integrity section, turn on Image Proctoring.
Turn on Image Analysis.
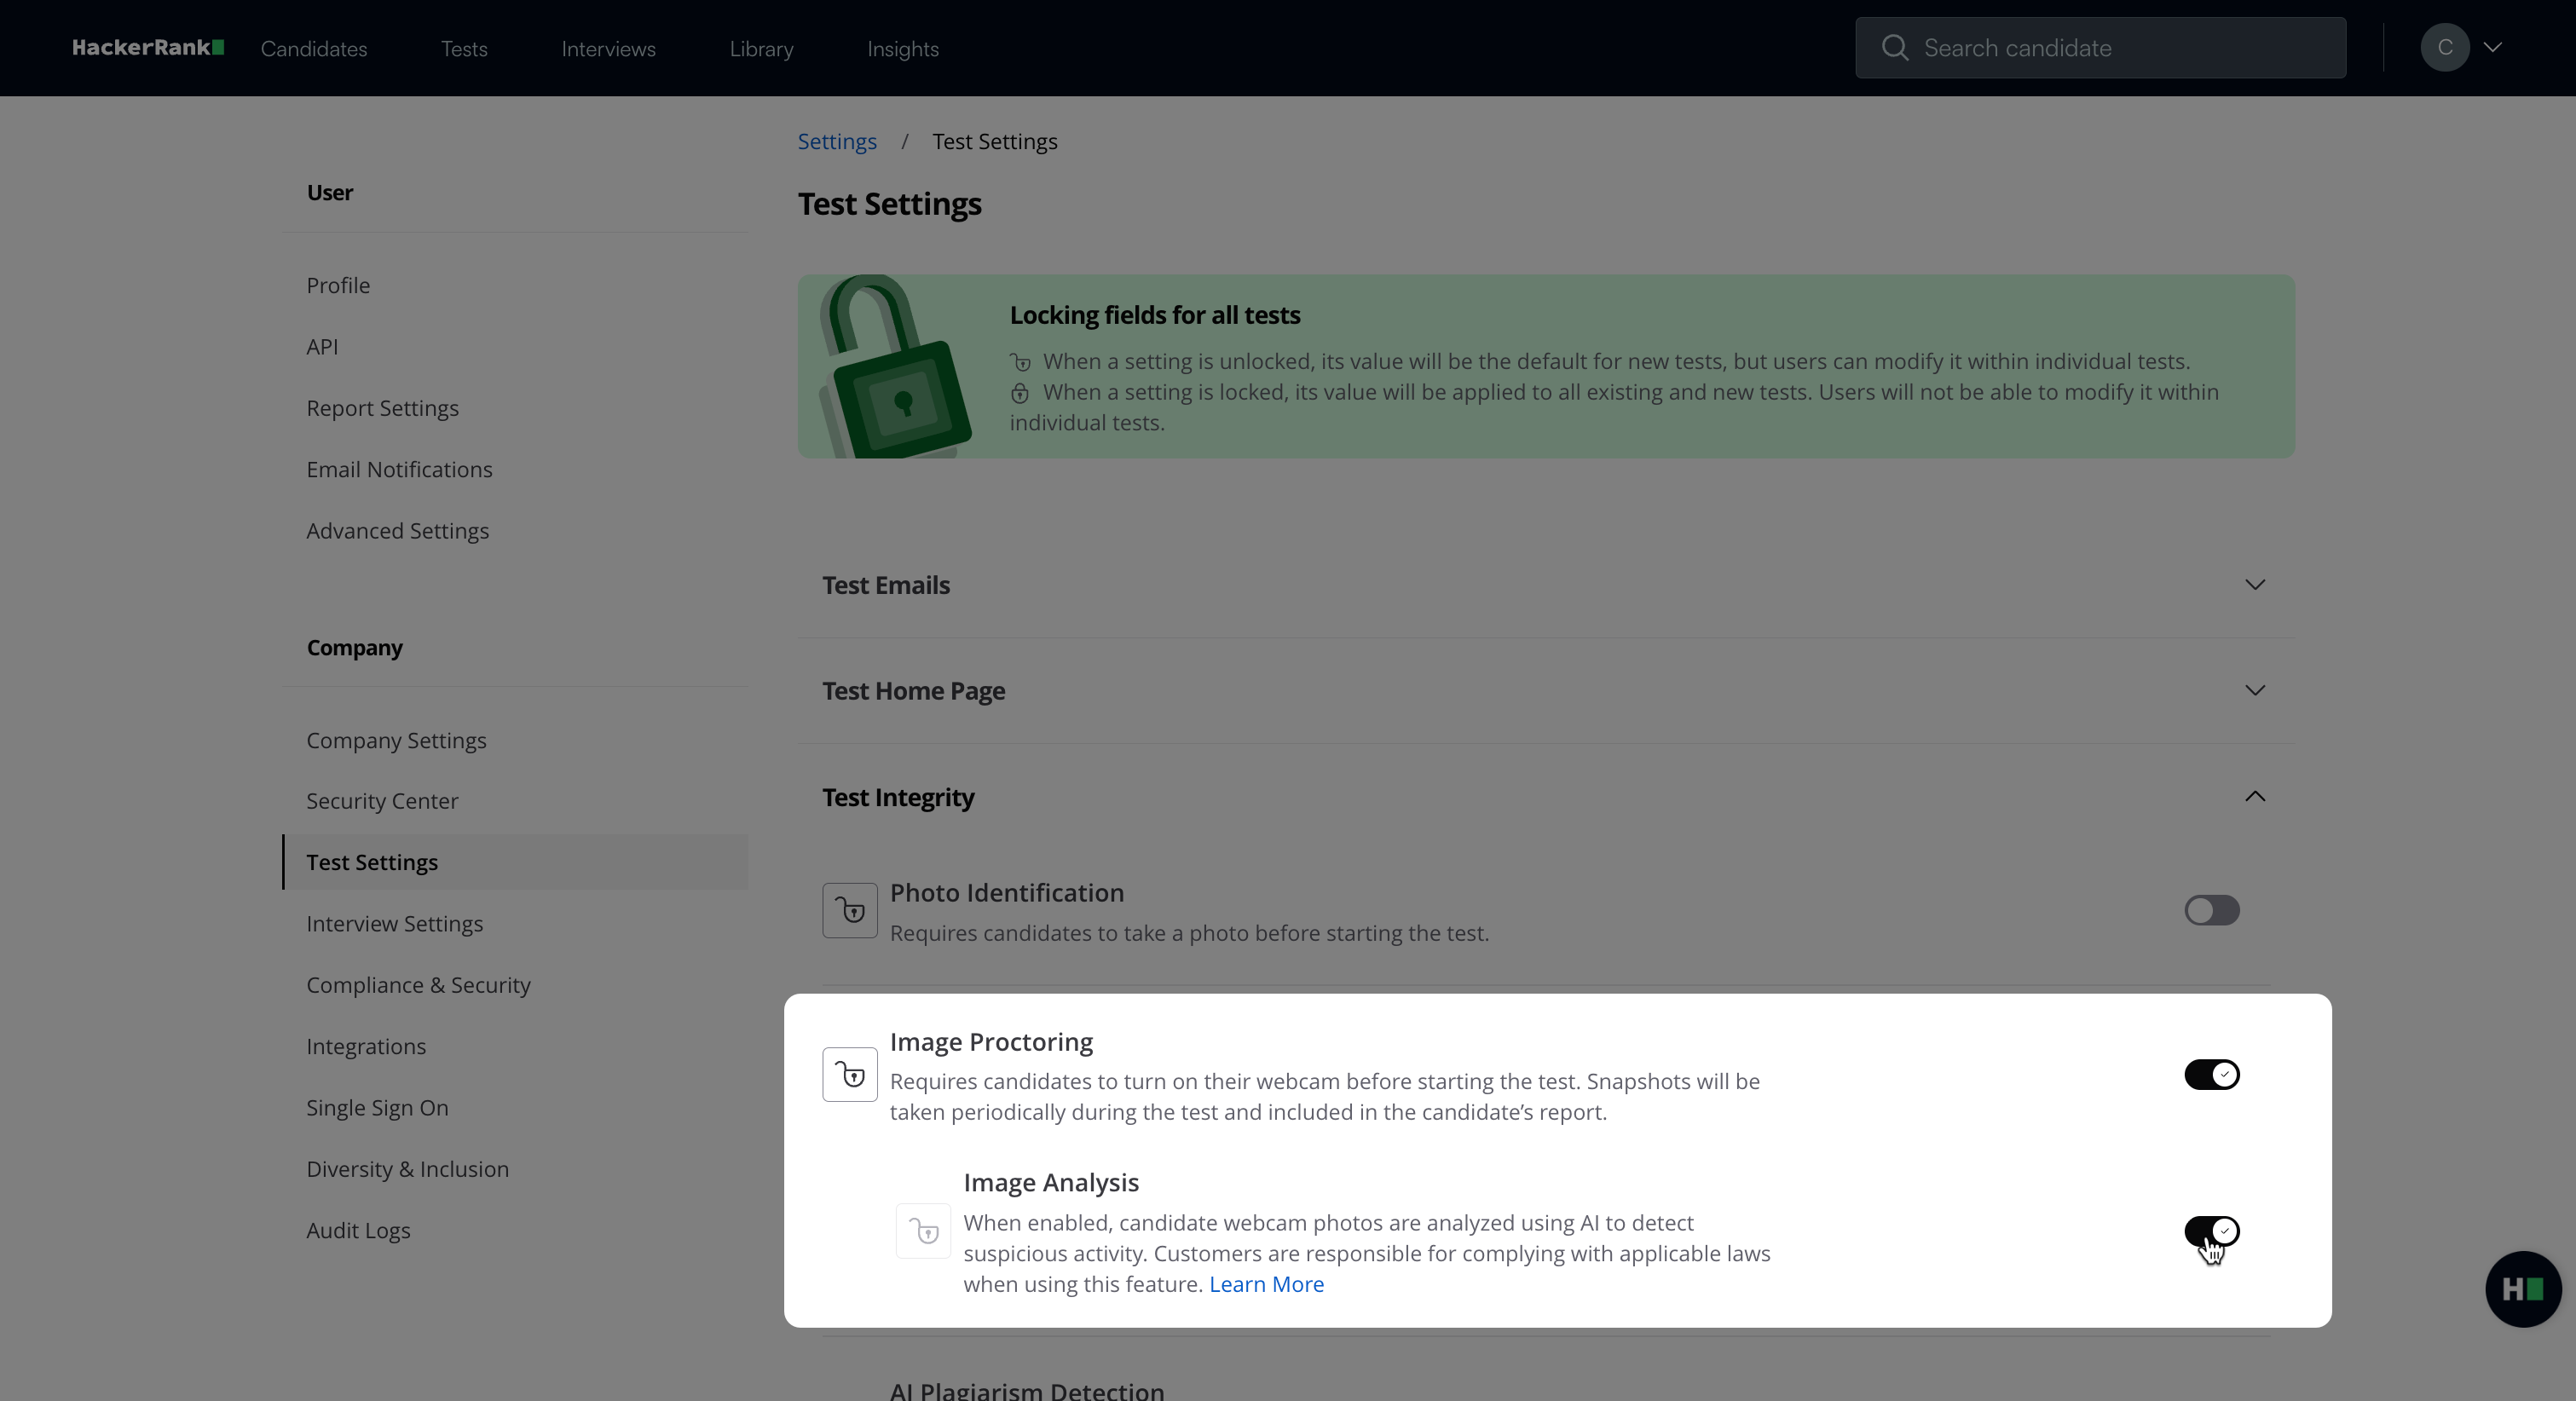
In the Image Analysis confirmation dialog, click Agree & Enable.
Click Save Changes.
Enabling Image Analysis at the test level
To enable Image Procotoring at the test level:
Go to the Tests tab.
Select the test you want to configure.
Go to Settings > Test Integrity.
Turn on Image Proctoring.
Turn on Image Analysis.
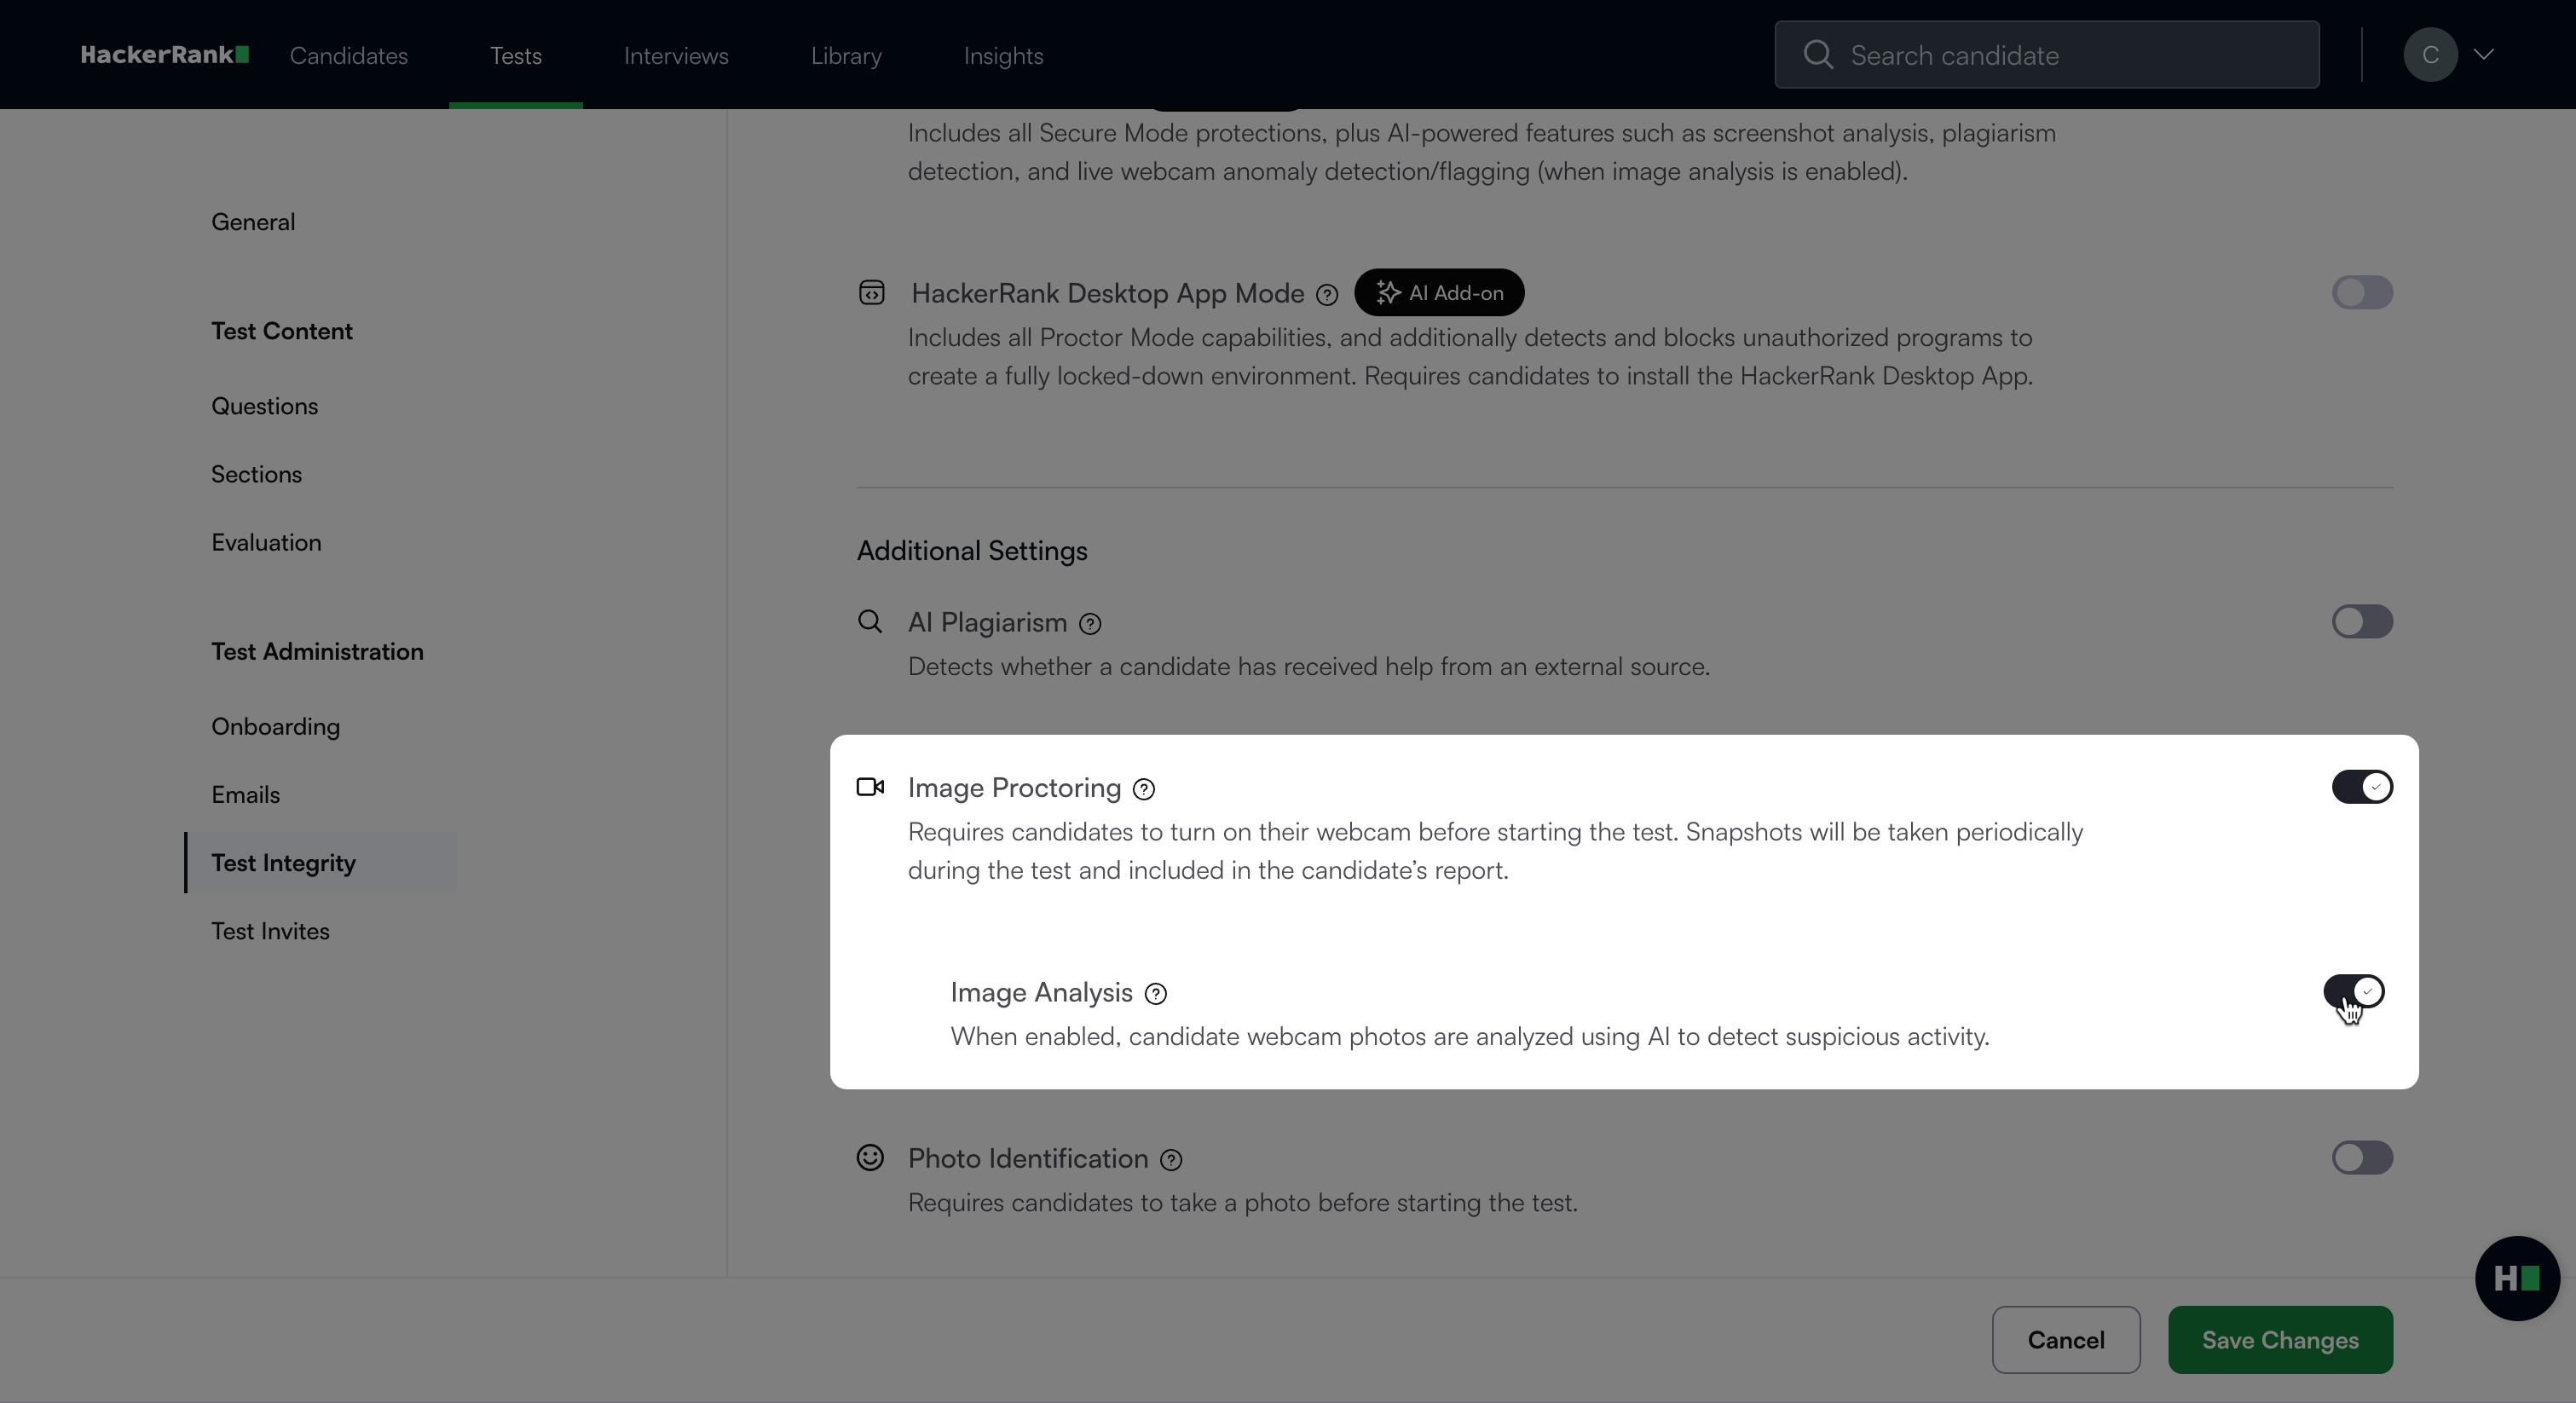
Click Save Changes.
Note: For more information about HackerRank’s NYC AI law compliance, see 📄 HackerRank Services and AI Laws FAQs.
How Image Analysis works
Before the test
The system prompts candidates to allow webcam access. Candidates must select Grant Access under Allow Webcam Access to proceed.
During the test
The system captures and analyzes images when it detects suspicious activity. It categorizes flagged images into the following types:
Multiple faces: Detects two or more individuals in the same frame.
Secondary faces: Detects two or more unique faces at different times during the session.
No face: Detects when no face appears in the frame.
Static face: Detects static image projections.
Note: HackerRank supports Image spoofing detection that identifies candidates who attempt to simulate a live presence using static images or software during the test. This helps detect attempts to bypass webcam-based monitoring.
After the test
The flagged images appear in the candidate’s Summary Report for manual verification.
To view flagged images in the Summary Report:
Open the candidate’s Summary Report. For detailed steps to access the Summary Report, see Accessing the Summary Report.
Go to the Attempt Activity tab.
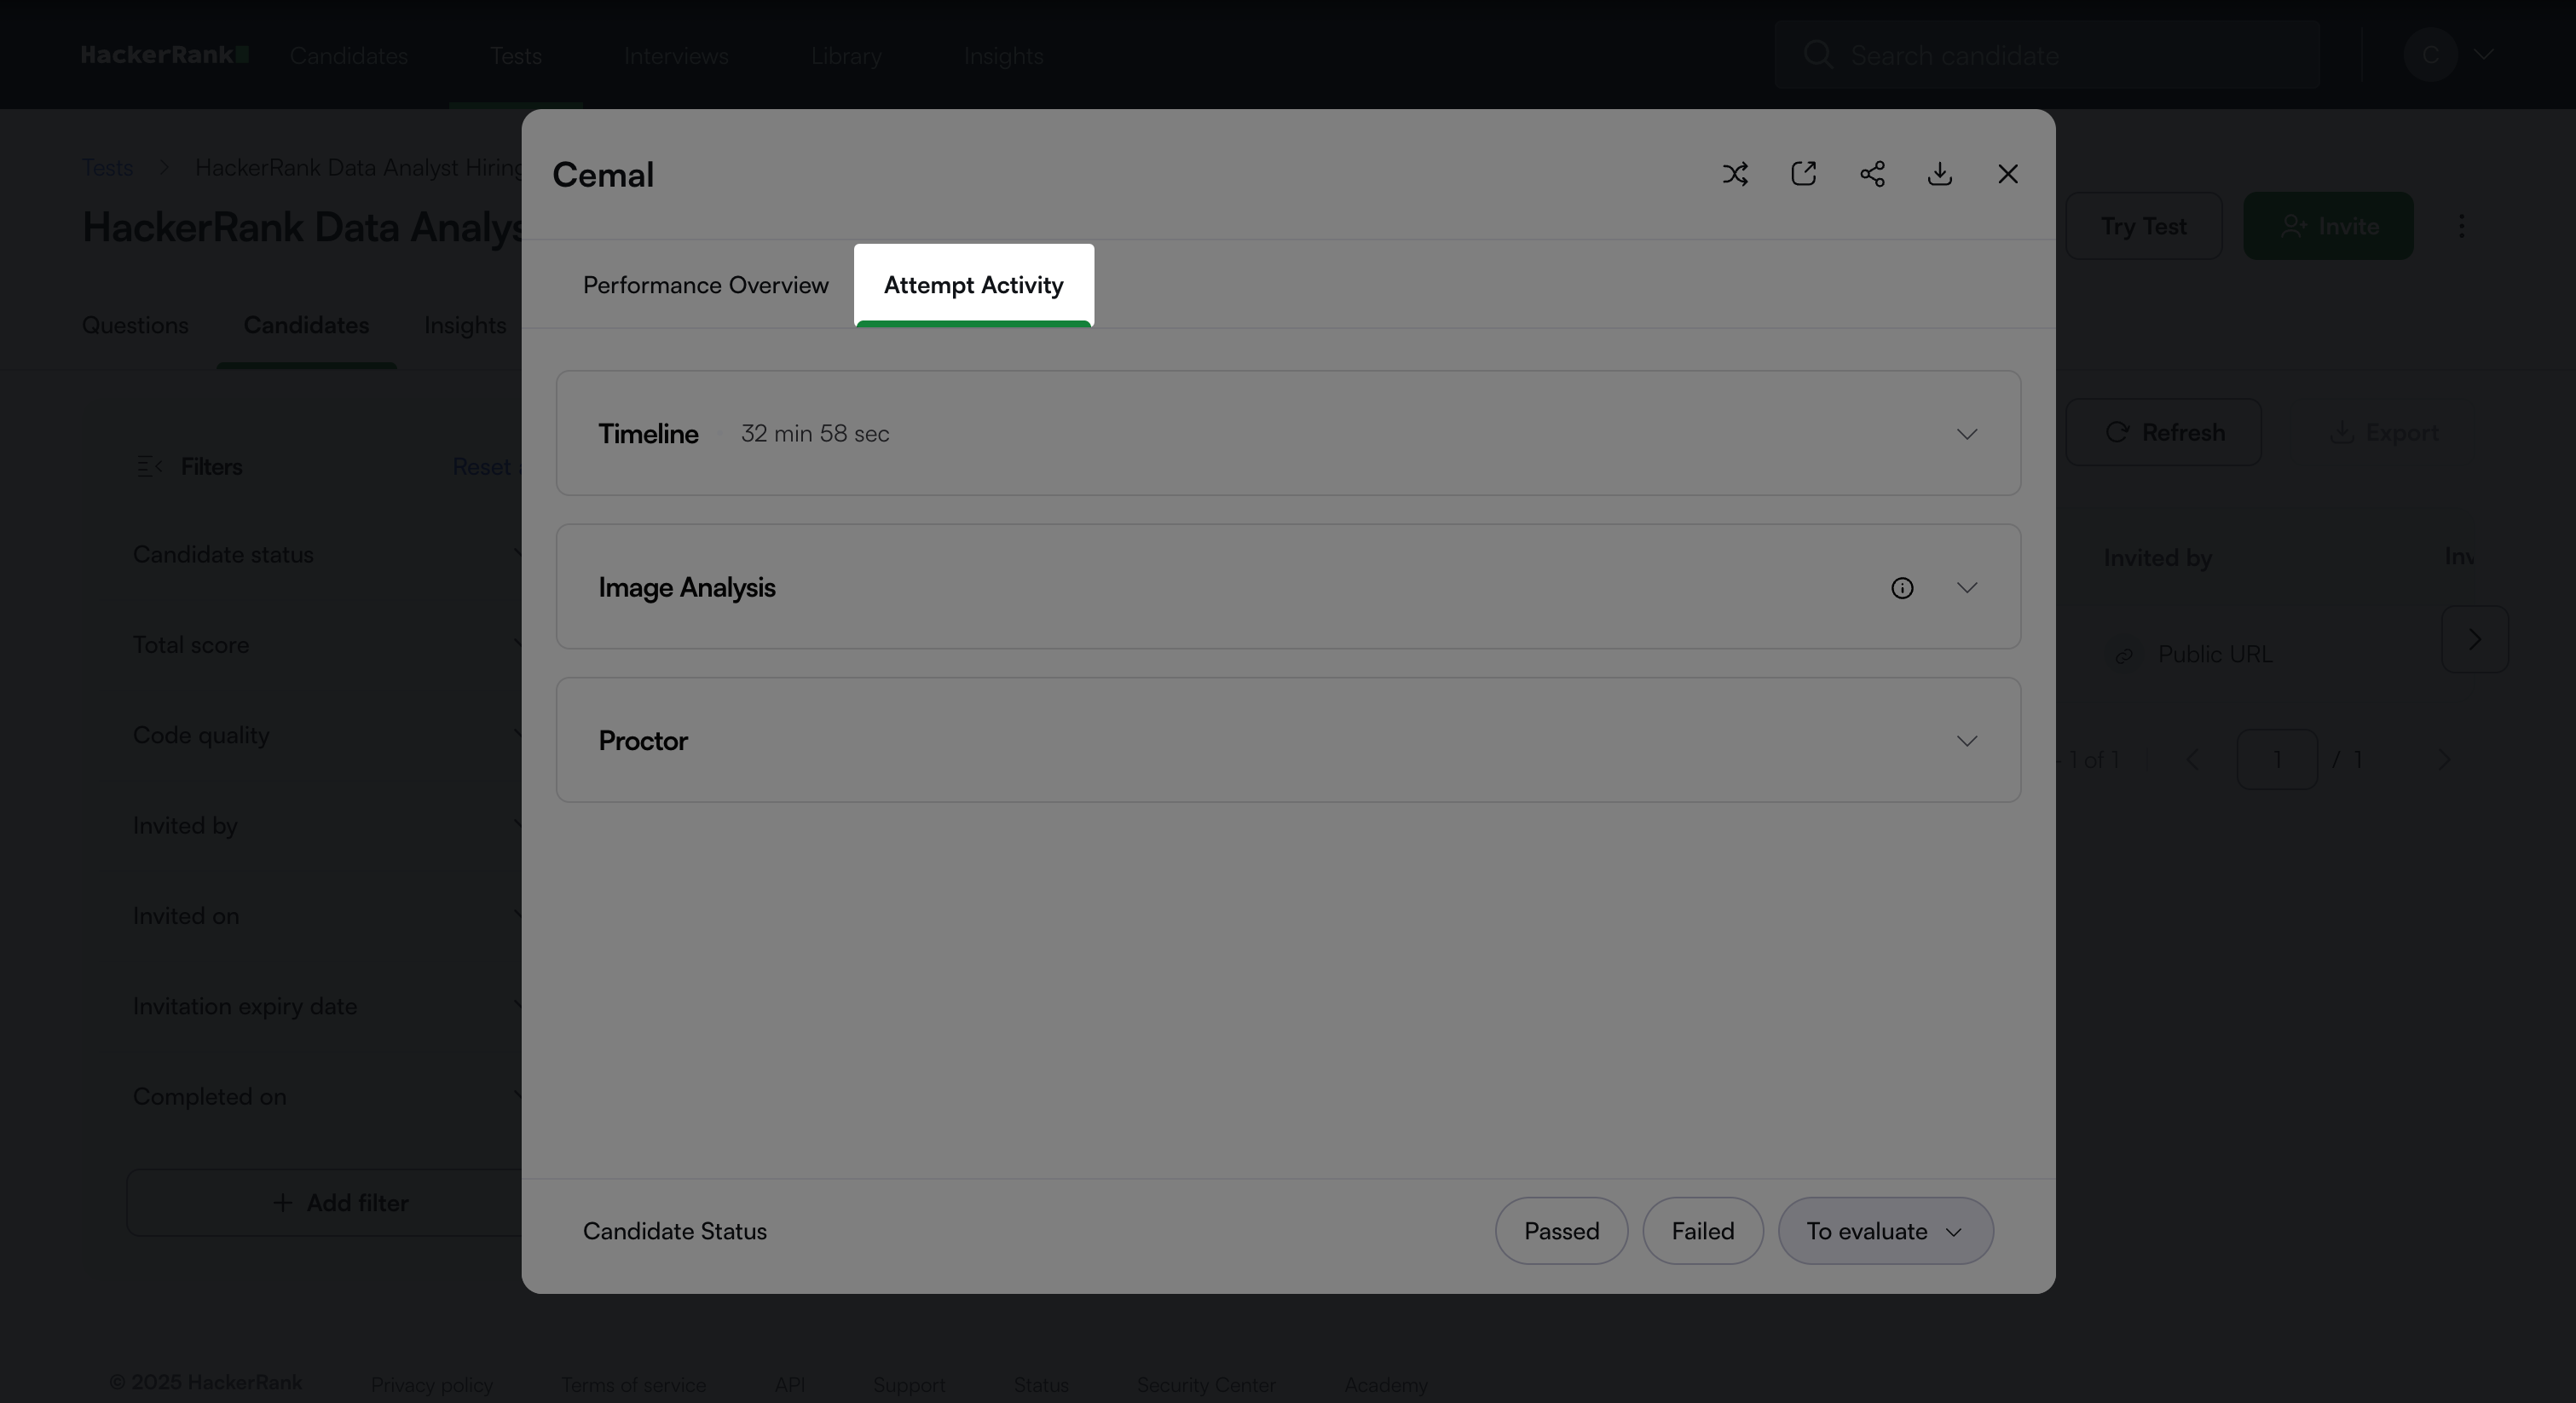
Expand the Image Analysis section to view flagged images.
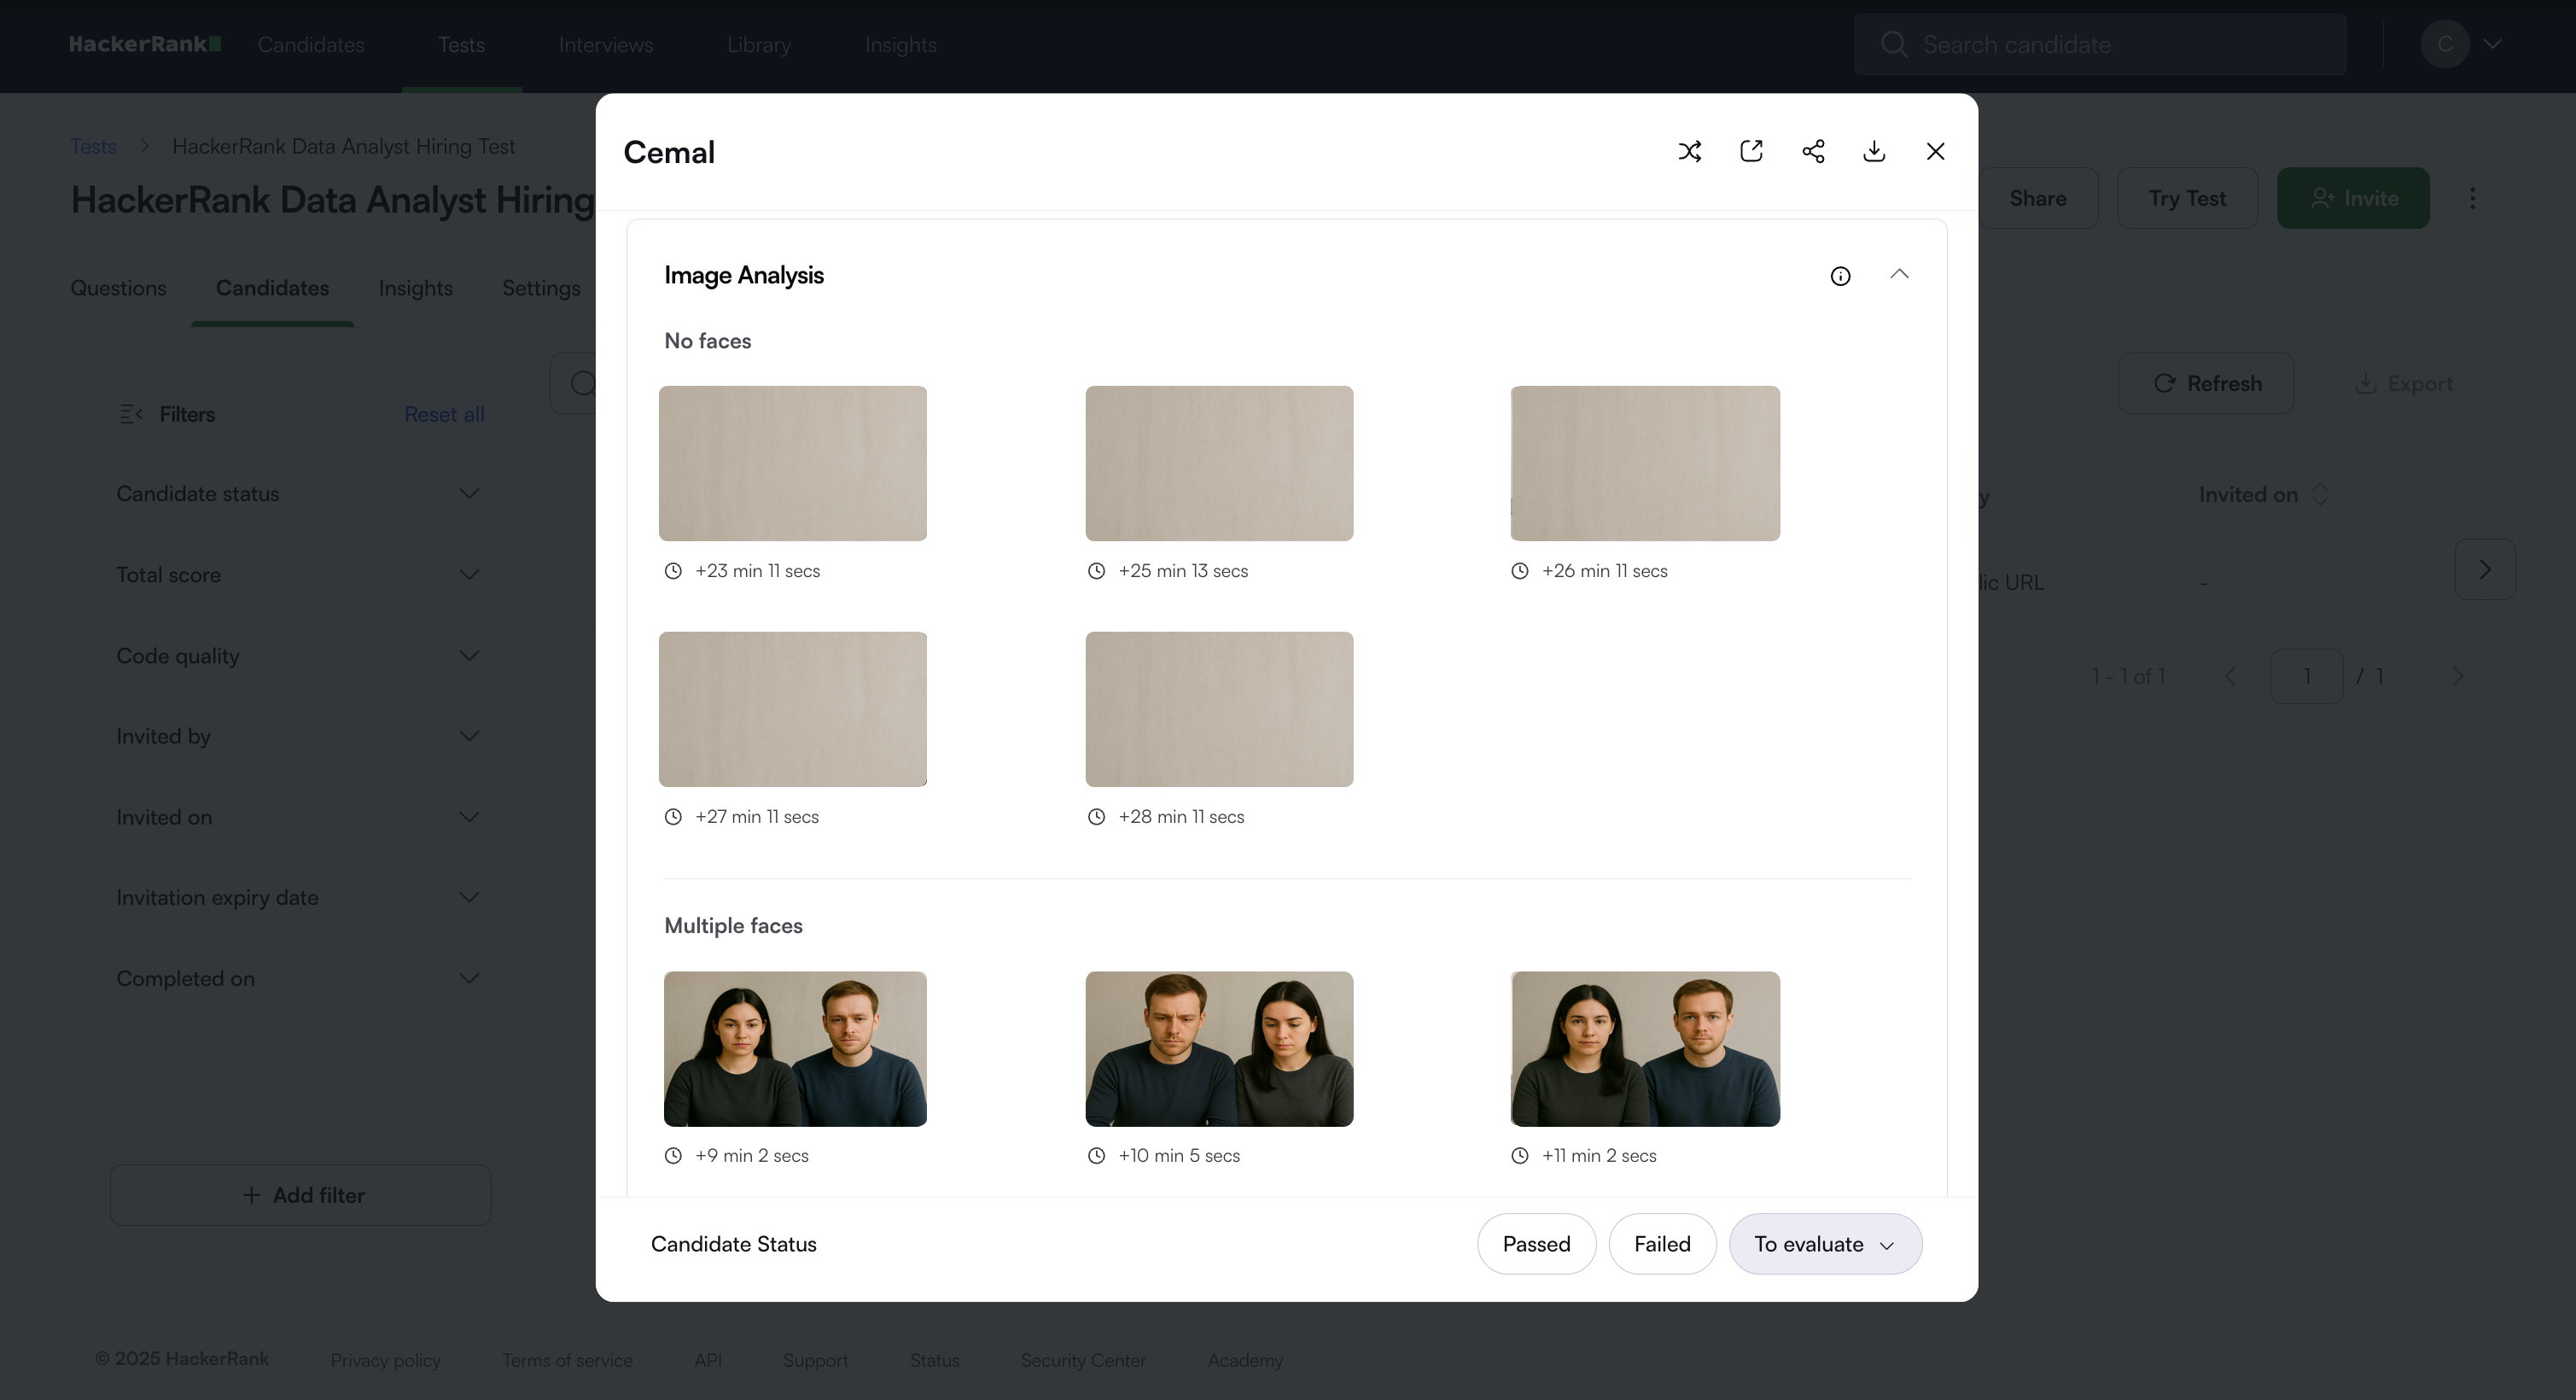
Each flagged category (Multiple faces, Secondary faces, No face, Static face) displays up to five images to help you quickly review flagged behavior.
You can review the flagged images to evaluate suspicious activity.